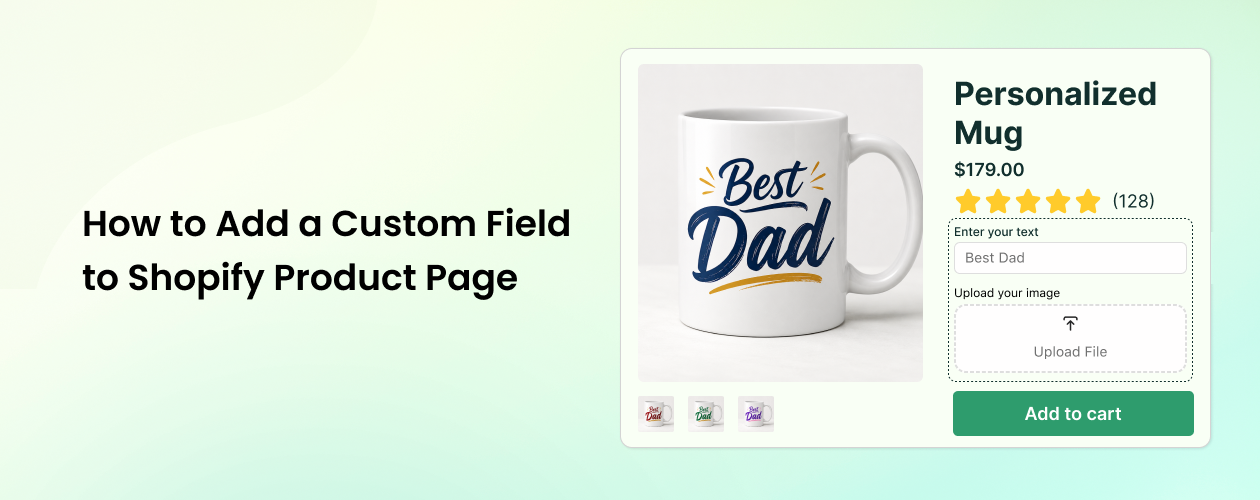
What Is a Custom Field and Why Does It Matter?
A custom field is an input element added directly to your product page that collects unique information from a customer before they buy. Shopify’s native system is built to manage inventory variants such as Size or Color. It isn’t designed to capture open-ended customer data like a monogram, a set of instructions, or an uploaded file.
Custom fields fill that gap. They let you add text boxes for engraving, image or file uploads for custom printing, dropdowns for gift options, or date pickers for scheduled delivery, all without affecting your inventory count.
The biggest advantage is that custom fields let merchants collect product-specific details without creating unnecessary variant combinations. Instead of creating a separate variant for every possible personalization option, a custom field acts as an extra layer of information attached to a single product. You receive every detail you need the moment the order is placed, which removes time-consuming follow-up emails and helps each personalized order move to fulfillment faster.

How to Add a Custom Field to a Shopify Product Page
There are two ways to do this.
The native method uses Shopify metafields plus Liquid code. You define the fields in your admin settings, then manually edit your theme’s template files so the input appears correctly on the storefront. This gives you full control, but it requires a solid understanding of Liquid, and a small mistake can break your product page layout. For most store owners it’s slow, risky, and hard to maintain.
The app method is the faster, safer route and is now the industry standard. An app like MPO – Multiple Product Options is built specifically for this. It lets you add unlimited custom fields, such as text boxes, dropdowns, image uploads, and date pickers, to any product page without writing a single line of code or editing your theme. Here’s the step-by-step.
Step 1: Install MPO – Multiple Product Options
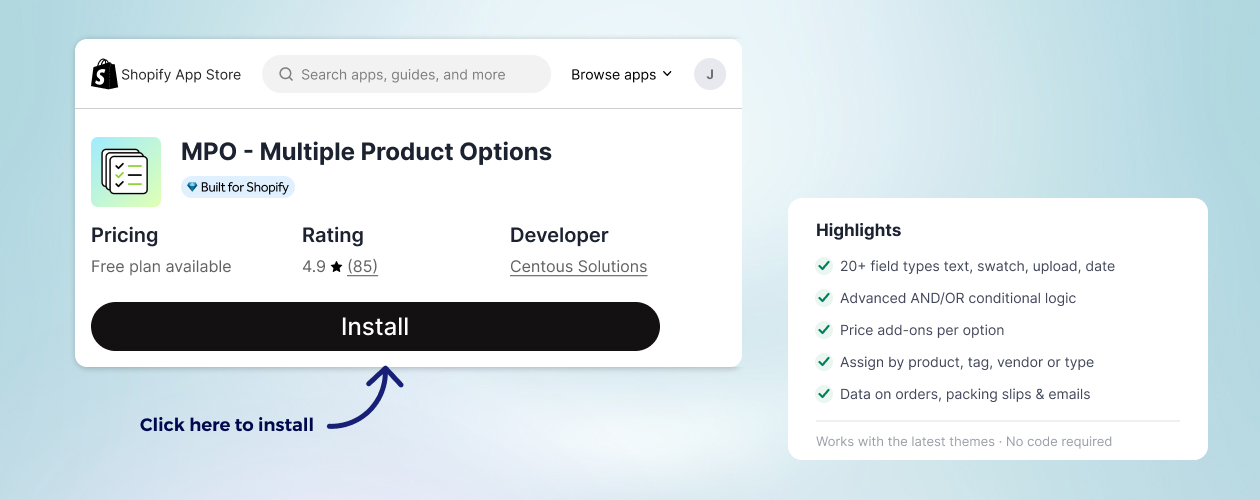
Open the Shopify App Store, search for MPO – Multiple Product Options, and click Install. MPO has a free plan, so you can set everything up before committing to a paid tier. Once installed, open the app from your Shopify admin.
Step 2: Create a New Field
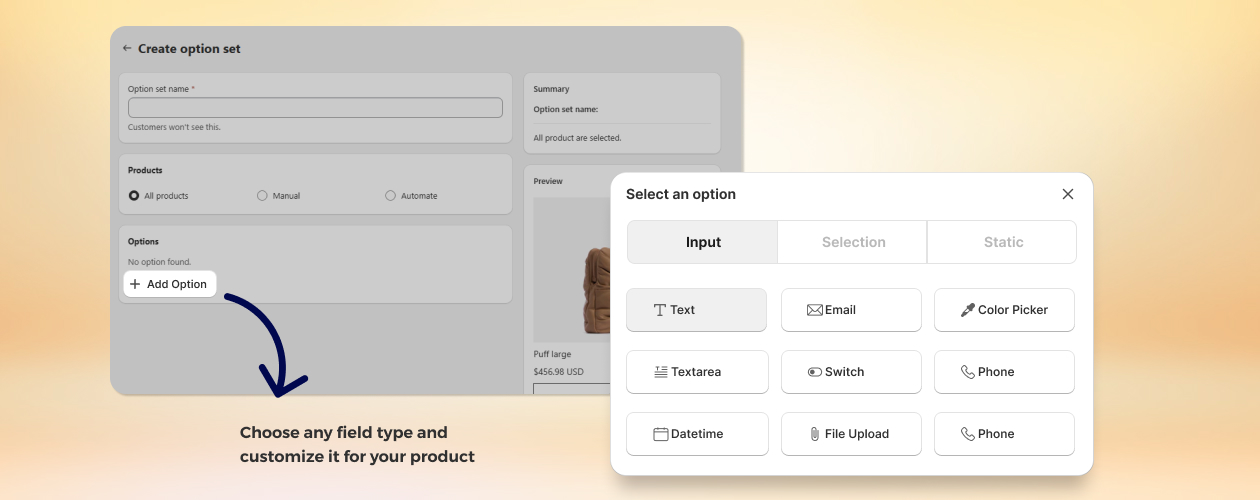
From the MPO dashboard, click Add New Field (or create a new form). Then choose the field type you need. MPO supports all the standard input types, including:
- Short text box (for example, a name or monogram)
- Long text box (for example, special instructions)
- Dropdown menu
- Radio buttons
- Image / file upload
- Date picker
Pick the type that matches the detail you want to collect, for example a short text box for engraving text.
Step 3: Configure the Field

Click the field you just created to open its settings. Here you can tailor it to your product:
- Label the field so customers know exactly what to enter (for example, “Enter engraving text”).
- Set a placeholder and a default value to guide them.
- For text boxes, set minimum and maximum character limits.
- For image/file uploads, restrict the accepted file types and size.
- Mark the field as required so customers can’t check out without completing it.
- Optionally enable price add-ons to charge an extra fee.
Step 4: Add More Fields (Optional)
Need to collect several details on the same product? Keep adding fields to build out the full form. You can combine multiple types, for example a text box for a name, an image upload for a logo, and a date picker for delivery, all on one product page.
Step 5: Assign the Field to Your Products
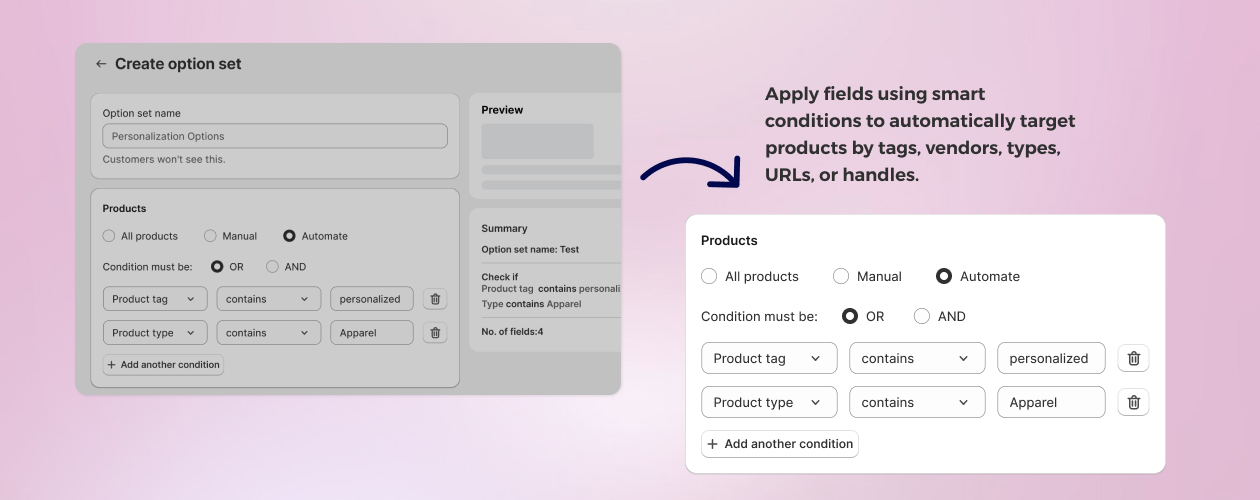
This is where MPO is especially flexible. Instead of editing each product by hand, you can target where your custom fields appear by product tag, vendor, type, URL, or handle, or apply them to all products at once. Assign the field to a single item, a whole collection, or your entire catalog in just a few clicks.
Step 6: Save and Preview
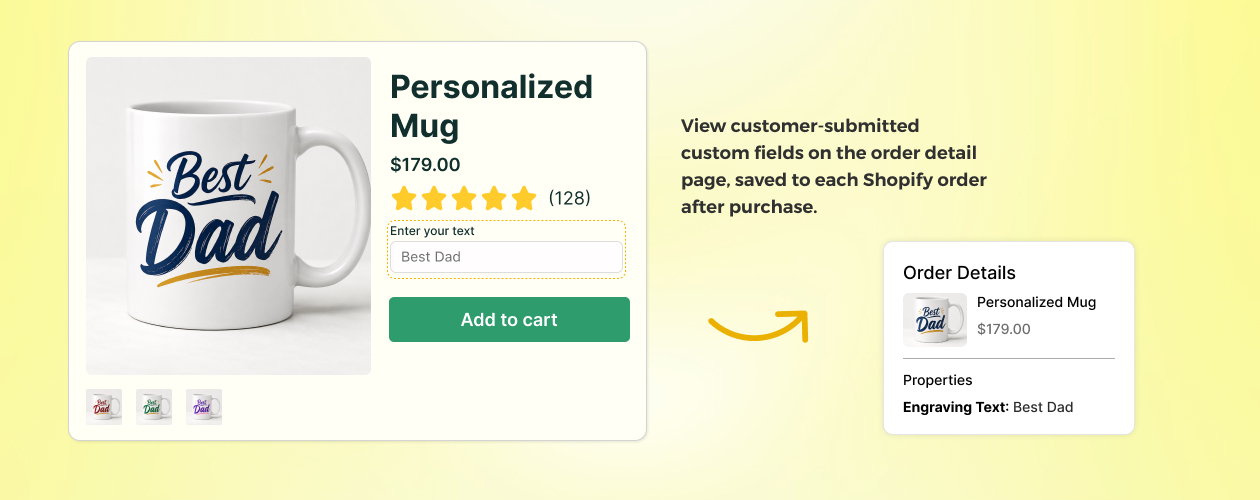
Click Save. Your custom fields appear on the product page immediately, with no theme edits required. Visit the product on your storefront to confirm everything looks right. When a customer fills in the field and orders, the collected data is attached to the order in your Shopify admin, so it’s ready for fulfillment.
Tip: You can also display the captured custom field data on your order confirmation emails and packing slips, so your fulfillment team sees every personalization detail without opening the app. This keeps custom orders moving quickly and error-free.